
Creating Sketches in the Sketching Environment-I
We can create a sketch in NX in the Sketching environment. To invoke the sketching environment for creating sketch, use the Sketch in Task Environment tool from the Curve group in the Curve tab of the Ribbon. After choosing this tool, the Create Sketch dialog box will be displayed and you will be prompted to select a sketching plane. Specify the other required parameters in the dialog box and then choose the OK button, the sketching environment will be invoked. Now, we can create the sketch by using the tools that are available in the Sketching environment. To finish the sketch, you need to choose the Finish tool from the Sketch group.
Drawing Sketches Using the Profile Tool
To invoke the profile tool for creating Sketches following are the two ways:
Ribbon: Home > Direct Sketch > Sketch Curve > Profile
Menu: Insert > Sketch Curve > Profile
This (Profile tool) is the most commonly used tool to draw sketches in NX. This tool allows us to draw continuous lines and tangent/normal arcs. To draw a continuous lines and tangent/normal arcs using this tool, choose the Profile tool from the Direct Sketch group of the Home tab, the Profile dialog box will be displayed.
The dynamic input boxes are also displayed below the cursor and you are prompted to select the initial starting point of the line. This dynamic input boxes allow us to enter the required coordinates or the length and angle of the line.
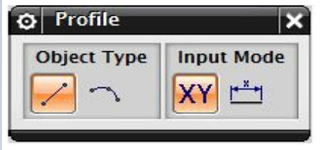
The Profile Tool allows us to draw Lines, tangent arcs in same tool.
- Drawing Lines: The option to draw straight lines is active by default when you invoke the Profile tool. This is because the Line button is chosen by default in the Profile dialog box. NX allows us to draw lines by using two methods.
1.1 Drawing Lines by Entering Values: In this method, you have to enter the coordinate values or the length and angle of the line. The values are entered in the dynamic input boxes available below the cursor when you invoke the Profile tool. Then it will prompt us to select the second point of the line. After specifying the initial starting point of the line, the dynamic input boxes will get converted into the length and angle modes.
HOW TO CREATE SKETCHES IN NX
This happens because the Parameter Mode button is automatically chosen in the Profile dialog box. As you move the cursor in the drawing window, the length and angle of the line are modified, based on the relative position of the cursor with respect to the point specified earlier in the dynamic input boxes.
The process of drawing line does not end after you specify the second point of the line. Instead, another line starts with its start point at the endpoint of the last line and the endpoint attached to the cursor.
After drawing a line, it is dimensioned automatically. This happens because the Continuous Auto dimensioning tool is chosen by default in the more gallery of the Direct Sketch group in the Home tab.
1.2 Drawing Lines by Picking Points in the Drawing Window: The most convenient method of drawing lines is by Picking points in Drawing Window and it is extensively used in sketching. The parametric behavior of NX secure that irrespective of the length of the line is drawn, you can modify it to the required values using dimensions. To draw lines using this method, invoke the Profile tool and pick a point in the drawing window a line will appear. By picking a point in the drawing window, specify the endpoint of the line, then another line will appear in continuation with the previous line. The endpoint of the last line now becomes the start point another line.
To draw a chain of the continuous line, we have to specify the endpoints of each line. Some symbols will appear while drawing a line on the right of the cursor. Let’s take an example, after specifying the start point of the line, if we move the cursor towards horizontal direction, an arrow pointing toward the right will get displayed. This arrow indicates that it is the symbol of the Horizontal constraint applied to the line. The constraint applied will ensure that the line you draw is horizontal and cannot be modified unless the constraint been removed. While creating/drawing any sketches the constraints are automatically applied to the sketch.
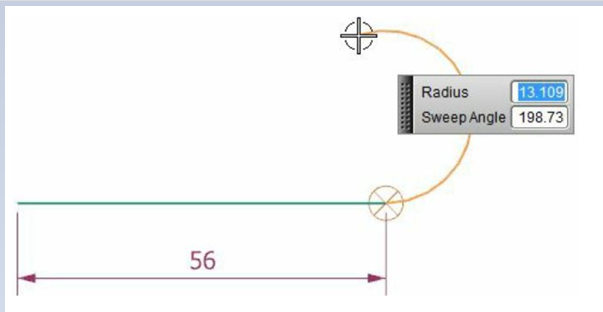
1.3 Drawing Arcs: The option to draw arcs can be activated by choosing the Arc button in the Profile dialog box. Or, to invoke the arc mode we can press and hold the left mouse button and move the cursor to arc option. Since this option comes with Profile tool, so the arcs that are drawn by using this tool will be in continuation with lines. Hence, the endpoint of the last line is taken as the starting point of the arc. As a result, whenever the arc mode is invoked, we only need to specify the endpoint of the arc.
Important term and definitions in NX
You will notice that when you draw an arc in continuation with lines, a circle with four quadrants will appear at the start point of the arc. This is called as the quadrant symbol and it helps us in defining whether we need to draw a tangent arc or a normal arc. And it also helps us in specifying the direction of the arc.
We will more post on CAD Tool–>Siemens NX in upcoming days.
Kindly provide your valuable comment on below Comment section and also have you any question kindly ask to ASK QUESTION in FORUM . Our Team will try to provide the best workaround.
Kindly subscribe your Email-Id at (http://globalplm.com/) and drop any suggestion/queries to ([email protected]).